Key takeaways
- Score the cut line with a utility knife first on 1/8″ board; a shallow pass severs surface fibers and dramatically reduces chipping.
- Clamp a straightedge instead of trusting a pencil line. Two clamps, always, so it can’t creep mid-cut.
- Use a fine-tooth blade, 40 teeth or higher for small-diameter saws. Coarse framing blades tear hardboard badly.
- Cut slightly oversized, then sand to the line with 120-grit on a block. It’s faster than recutting a panel that came out short.
What's inside
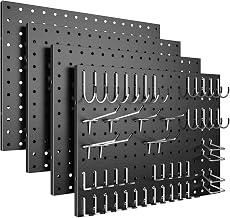
Pegboard has quietly become the backbone of good outdoor storage. It lines the back wall of potting benches, turns a bare shed stud bay into a hand-tool wall, hangs grill brushes and tongs beside a built-in, and keeps pool towels and skimmer nets off the deck. But almost every one of those projects starts the same way: a 4×8 sheet that needs to become something smaller, squarer, and cleaner than what came off the rack.
That cut is where most pegboard projects go sideways. Tempered hardboard chips on the face, wanders off square, and clogs a blade with fine brown dust that gets into everything. Below, I’ll walk through how to identify what your sheet is actually made of, how to lay out cuts so the hole grid still looks intentional, which tool suits which cut, and how to finish edges so the panel survives humidity, sprinklers, and shoulder-season temperature swings.
Our recommended picks for this job:
As an Amazon Associate we earn from qualifying purchases.


Identify the Sheet Before You Touch a Blade
Most pegboard sold at home centers is tempered hardboard, typically 1/8″ or 1/4″ thick, made from compressed wood fiber and resin. It’s dense, abrasive, and prone to chipping on the show face. A smaller share is MDF-core pegboard, which cuts more smoothly but drinks up moisture fast. Then there’s polypropylene and metal pegboard, both increasingly common for covered patios and outdoor kitchens. Each one wants a different approach, so check the edge and the weight of the sheet before you commit. The 1/4″ tempered stuff is the workhorse for garden and shed walls because it holds standard hooks without deflecting.
Lay Out Around the Holes, Not the Edges
Pegboard is a grid, and the eye reads that grid instantly. A panel with a half-hole running down one side looks like a mistake even if the dimensions are perfect. Measure your cut, then shift it to land squarely between hole rows, keeping at least 1/2″ of solid material at the edge so hooks near the perimeter still have support. If your opening is fixed, split the difference: trim equally from both sides so the border is symmetrical. Mark the cut line with a pencil on the good face, then place painter’s tape over the line to reduce splintering as the blade exits.
Match the Tool to the Cut
Long, straight rips are the most common cut and the easiest to get wrong freehand. A compact saw with a guide solves it. The SEESII Mini Circular Saw is well suited here: the 4-1/2″ blade and laser guide make it easy to track a clamped straightedge, the bevel adjustment handles angled edges for sloped shed walls, and dust extraction keeps the fine hardboard powder contained. For notches, cutouts around outlets, and short trims where dragging out a saw isn’t worth it, the 8-in-1 Multi Blades Hand Saw covers plunge cuts and tight corners with a quick blade change.
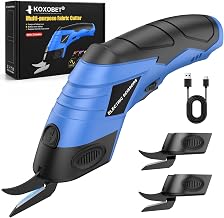
Thin sheets and non-wood pegboard open up quieter options. Plastic pegboard and 1/8″ panels shear cleanly in a 13″ Laminate Floor Cutter, which produces zero dust and cuts both angle and length in one motion, making it a genuinely pleasant tool to use inside a finished porch. For template work, cardboard mockups, and trimming backing material, the Fanttik C10 Pro BowGuide cordless rotary cutter and the 2026 Upgrade Cordless Cutting Tool both handle plastic, felt, and fabric quickly. The Multi-Cut 401 is a useful companion for soft materials and plastics, though it’s not intended for hardboard or compressed wood.
Support the Sheet and Control the Dust
Pegboard flexes, and flex causes binding, burning, and wavy lines. Support the full sheet on rigid foam or a pair of sacrificial 2x4s so both halves stay put through the cut. Set your blade depth just past the sheet thickness, roughly 1/8″ deeper, to reduce tear-out. Cut with the finished face up when using a circular saw, since the blade teeth exit through the underside. And wear a proper respirator: hardboard dust is fine, persistent, and unpleasant, especially in an enclosed shed.
Seal Cut Edges Before Anything Goes Outdoors
Factory faces are sealed; your fresh cuts are raw fiber. On a covered patio or shed wall, that raw edge is the first place moisture gets in and swells. Prime every cut edge and hole-free border with an oil-based or shellac primer, then topcoat. Better still, cap the perimeter with a thin wood frame, which stiffens the panel, hides the edge, and creates the standoff pegboard needs for hooks to seat properly.
Tips
- Score the cut line with a utility knife first on 1/8″ board; a shallow pass severs surface fibers and dramatically reduces chipping.
- Clamp a straightedge instead of trusting a pencil line. Two clamps, always, so it can’t creep mid-cut.
- Use a fine-tooth blade, 40 teeth or higher for small-diameter saws. Coarse framing blades tear hardboard badly.
- Cut slightly oversized, then sand to the line with 120-grit on a block. It’s faster than recutting a panel that came out short.
Frequently Asked Questions
Can I cut pegboard with a jigsaw?
Yes, and it’s the right choice for curves and interior cutouts. Use a fine-tooth downcut blade to keep the top face clean, and move slowly, letting the blade clear chips rather than forcing it.
Will cutting through the holes weaken the panel?
It will. A cut that clips a row of holes leaves thin, fragile webs that crumble under hook load. Always keep a solid margin along the cut edge.
Is pegboard suitable for uncovered outdoor use?
Hardboard and MDF pegboard need shelter. For an exposed patio or fence-mounted setup, choose polypropylene or metal pegboard, which shrug off rain without swelling.
Do I need to sand after cutting?
A light pass with 120-grit knocks down burrs and makes the edge ready for primer. Skip the aggressive sanding; hardboard edges compress rather than smooth.
Conclusion
Cutting pegboard well comes down to four decisions: knowing your material, laying out to the grid, choosing a tool that suits the cut length and location, and sealing the edges before the panel goes up. Get those right and a single sheet turns into a shed wall, a potting bench backsplash, and a grill-side hook rail that all look like they were made for the space.