Our Top Picks
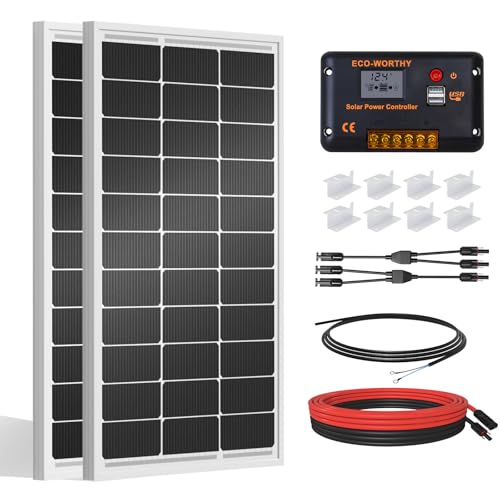 ECO-WORTHY 200 Watts 12 Volt/24 Volt Solar Panel200W - KIT39.37 x 22.44 x 3.7 inches31.6 poundsCheck on Amazon
 ECO-WORTHY 7.168KWH 800W Solar Panel Kit for RV800W PCS COMPLETE SYSTEM58.86 x 26.18 x 1.18 inchesCheck on Amazon
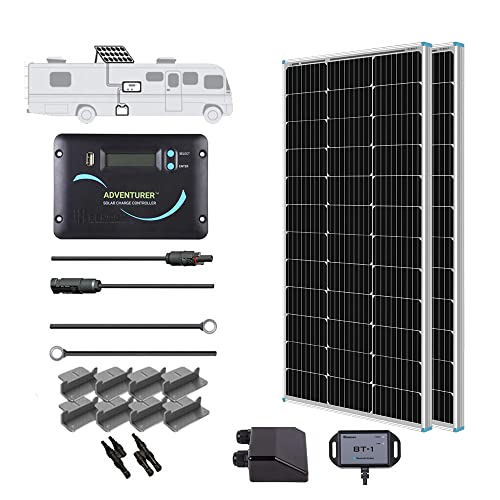 Renogy 200W 12V N-Type RV Solar Panel KitRV200W+ADV 30A42.4 x 20 x 1.38 inches16.5 poundsCheck on Amazon
 Renogy 100W 12V Solar Panel Starter Kit with100W Panel+PWM 30A Controller41.8 x 1.38 x 20.9 inches14.1 poundsCheck on Amazon
For most RV owners, the best solar panel kit for RV use in 2026 is a 400 W rigid-panel kit bundled with a 40 A MPPT charge controller — it harvests roughly 1.2–1.8 kWh a day in summer, fits the roof of a 20–24 ft travel trailer or a Class C without crowding vents and AC shrouds, and stays compatible whether you run a 200 Ah lead-acid bank or a 100–200 Ah LiFePO4 bank. Drop to a 200 W kit if your loads are lights, a water pump, and a compressor fridge; step up to 600–800 W if you run Starlink, a CPAP, a laptop, and a furnace blower through winter. Avoid any kit whose charge controller is PWM unless the array is under 150 W or the price is genuinely throwaway.
That is the short version. The longer version matters because RV solar kits are sold on wattage, and wattage is the least useful number on the box. Two 400 W kits can differ by 30% in daily harvest, by $400 in price, by whether they work with lithium at all, and by whether installing them means four drilled roof penetrations or none. What follows is a decision framework built around the six variables that actually determine whether a kit works on your rig: array wattage, battery compatibility, panel type, controller quality, roof versus portable mounting, and installation complexity. Then it walks through the kit classes worth considering in 2026, with the numbers that separate them.
ECO-WORTHY 200 Watts 12 Volt/24 Volt Solar Panel Kit with High Efficiency Monocrystalline Solar Panel and 30A PWM Charge Controller for RV, Camper, Vehicle, Caravan and Other Off Grid Applications
Chosen because it specifies Camper and Vehicle.
View on AmazonECO-WORTHY 7.168KWH 800W Solar Panel Kit for RV Off Grid Complete System
Picked as a relevant option in this category.
View on AmazonRenogy 200W 12V N-Type RV Solar Panel Kit with Adventurer 30A Controller
Picked as a relevant option in this category.
View on AmazonRenogy 100W 12V Solar Panel Starter Kit with 30A PWM Controller
Picked as a relevant option in this category.
View on AmazonWhat Actually Matters in an RV Solar Kit
A kit is not a panel. It is a system of five parts, and the cheapest component usually sets the ceiling for the whole thing:
- The panel or array. Determines peak watts and, more importantly, physical footprint and weight on the roof.
- The charge controller. Determines how much of the array’s output reaches the battery. This is where budget kits lose the most.
- The wiring and connectors. Determines voltage drop. Undersized cable can cost you 5–10% of harvest invisibly.
- The mounting hardware. Determines whether the panels stay attached at 70 mph and whether you have introduced a leak path.
- The battery interface. Determines whether the controller charges your bank fully, chronically undercharges it, or overcharges it.
The buying question, then, is not “how many watts?” It is “does this kit’s controller match my battery chemistry, does its panel format fit my roof, and does its wiring survive the run from roof to battery compartment?” A 300 W kit with a quality MPPT controller and 10 AWG cable will outperform a 400 W kit with a PWM controller and 14 AWG cable on the same roof, and it will cost about the same.
Start With Loads, Not Watts
Work backwards. Add up what you actually run in a day in amp-hours at 12 V, then size the array to replace it. The table below uses typical mid-size RV loads. Your numbers will differ — a 12 V compressor fridge in 95°F heat can pull double its mild-weather average.
| Load | Typical draw | Hours per day | Amp-hours per day at 12 V |
|---|---|---|---|
| LED interior lighting (6 fixtures) | 1.5 A | 4 | 6 Ah |
| Water pump | 7 A | 0.5 | 3.5 Ah |
| 12 V compressor fridge (60 qt) | 4–6 A average | 24 | 45–60 Ah |
| Absorption fridge control board (on propane) | 0.2 A | 24 | 5 Ah |
| Roof vent fan | 3 A | 6 | 18 Ah |
| Furnace blower (cold nights) | 7 A | 5 | 35 Ah |
| Laptop through inverter (60 W) | 5 A | 4 | 20–23 Ah |
| Phone and tablet charging | 1 A | 4 | 4 Ah |
| CPAP (no humidifier) | 3 A | 8 | 24 Ah |
| Starlink and router | 3–5 A average | 24 | 72–120 Ah |
| 12 V TV, 3 hours | 4 A | 3 | 12 Ah |
| Microwave through inverter | 100 A | 0.3 | 30 Ah |
A weekend rig running lights, pump, fan, and a compressor fridge lands around 75–90 Ah per day. A full-time rig with Starlink, a laptop, and a furnace in shoulder season lands at 180–250 Ah per day. A roof air conditioner is a separate category entirely — 100+ Ah per day and not realistically solar-solvable on a typical RV roof, which is why almost every serious build keeps the AC on shore power or a generator.
Turning Amp-Hours Into Array Watts
Peak sun hours are the currency here, not daylight hours. A good summer day in the US Southwest gives 5.5–6.5 peak sun hours; the Midwest and Northeast give 4–4.5; the Pacific Northwest gives 3–3.5 in summer and under 2 in December. Apply a realistic 0.75 derate for controller losses, wiring losses, panel heat, and the fact that flat-mounted roof panels are almost never aimed at the sun. That derate is where optimistic marketing numbers go to die.
| Array size | Excellent sun (5.5 PSH) | Good sun (4.0 PSH) | Marginal sun (2.5 PSH) | Winter north (1.5 PSH) |
|---|---|---|---|---|
| 100 W | 410 Wh / 32 Ah | 300 Wh / 23 Ah | 190 Wh / 15 Ah | 110 Wh / 9 Ah |
| 200 W | 825 Wh / 64 Ah | 600 Wh / 47 Ah | 375 Wh / 29 Ah | 225 Wh / 18 Ah |
| 300 W | 1,240 Wh / 97 Ah | 900 Wh / 70 Ah | 560 Wh / 44 Ah | 340 Wh / 26 Ah |
| 400 W | 1,650 Wh / 129 Ah | 1,200 Wh / 94 Ah | 750 Wh / 59 Ah | 450 Wh / 35 Ah |
| 600 W | 2,475 Wh / 193 Ah | 1,800 Wh / 141 Ah | 1,125 Wh / 88 Ah | 675 Wh / 53 Ah |
| 800 W | 3,300 Wh / 258 Ah | 2,400 Wh / 188 Ah | 1,500 Wh / 117 Ah | 900 Wh / 70 Ah |
Read that table against the load table and the sizing decision falls out. If you need 90 Ah a day and you camp mostly in good sun, 300 W is comfortable and 400 W gives you margin. If you need 200 Ah a day — Starlink plus furnace — you need 600–800 W and a lithium bank to absorb it, and you still need a plan for December. Note the column asymmetry: doubling the array does not double your winter capability, because winter losses scale with the array, not against it. This is why experienced full-timers in northern latitudes add a DC-to-DC charger from the tow vehicle or a small generator rather than stacking more panels.
Array Size Drives Controller Size
Once you know the array, the controller rating is arithmetic. Take array watts, divide by 12, multiply by 1.25 for safety and cloud-edge conditions.
| Array | Typical array current | Minimum controller | Recommended controller | Max PV open-circuit voltage headroom |
|---|---|---|---|---|
| 100 W | 5.5–6 A | 10 A | 15 A MPPT | 50 V minimum |
| 200 W | 11–12 A | 15 A | 20 A MPPT | 75 V minimum |
| 400 W | 22–24 A | 30 A | 40 A MPPT | 100 V preferred |
| 600 W | 33–36 A | 40 A | 50 A MPPT | 100 V preferred |
| 800 W | 44–48 A | 50 A | 60–70 A MPPT | 150 V preferred |
The voltage headroom column is the one people ignore and regret. Panels produce more open-circuit voltage in cold weather than at 25°C — roughly 10–12% more at −10°C with a typical −0.30%/°C temperature coefficient. Two 100 W panels in series with a 22.5 V Voc each produce 45 V warm and about 50 V at −10°C. A controller rated to 50 V max PV input is sitting at the edge. A 100 V controller costs $30–$60 more and removes the question entirely.
Panel Type Trade-Offs
This is the decision that shapes everything downstream — weight, mounting method, lifespan, and whether you can walk on your own roof.
| Panel type | Typical efficiency | Weight per 100 W | Cost per watt | Realistic lifespan | Best for | What fails first |
|---|---|---|---|---|---|---|
| Rigid monocrystalline (PERC) | 19–21% | 15–17 lb | $0.70–$1.10 | 20–25 years | Flat or gently curved roofs, permanent installs | Junction box potting, MC4 connector corrosion |
| Rigid monocrystalline (TOPCon / half-cut) | 21–23.5% | 16–18 lb | $0.85–$1.30 | 25+ years | Tight roofs where area is the constraint | Same as above; better shade tolerance |
| Flexible thin-film / CIGS | 15–18% | 4–5 lb | $1.10–$2.00 | 5–10 years | Curved van and trailer roofs, no-drill installs | Delamination from roof heat; backsheet cracking |
| Portable folding monocrystalline | 20–23% | 8–11 lb | $1.30–$2.20 | 8–12 years | Shade camping, renters, backup for a small roof array | Hinge fatigue, fabric case zippers, kickstand tabs |
| Bifacial rigid | 21–24% front face | 18–20 lb | $0.90–$1.40 | 25+ years | White or light-gray RV roofs with good clearance | Rear gain is only 5–15% on an RV, so rarely worth the weight |
The bifacial row deserves a note. Bifacial panels earn their premium on ground mounts over light gravel or on white commercial roofs with 4 ft of clearance. On an RV roof, the panel sits 2–4 in above a surface that is often dark and rarely reflective, and the rear-side gain drops to single digits. Buy bifacial for the durability and the better low-light behavior, not for the rear-face harvest.
Flexible panels are the most misunderstood product in this category. They are genuinely the right answer for a curved Transit or Sprinter roof, or for a trailer owner who refuses to drill. They are also the shortest-lived option by a wide margin: bonded directly to a hot roof with no airflow underneath, they run 20–30°C hotter than a rigid panel on the same roof, and heat is what kills the encapsulant. If you go flexible, plan on a 5–8 year replacement cycle and consider leaving a small air gap with a mounting frame rather than full-surface adhesive.
Controller Quality: Where Budget Kits Quietly Lose
There are two controller technologies and the difference is not subtle.
| Controller class | Harvest vs. panel rating | Typical cost for 30 A | Lithium support | Temperature compensation | Remote monitoring |
|---|---|---|---|---|---|
| Basic PWM | 60–75% | $20–$45 | Sometimes, via a fixed profile | Rare | None |
| Good PWM with lithium profile | 70–80% | $45–$80 | Yes, selectable | Sometimes | None |
| Budget MPPT | 85–92% | $90–$160 | Yes, user-definable | Usually | Bluetooth on some |
| Premium MPPT | 92–97% | $140–$320 | Yes, fully programmable | Yes, with battery sensor | Bluetooth + VE.Direct/CAN |
The harvest percentages are relative to the panel’s nameplate rating under real conditions, and they are the reason a 400 W PWM kit and a 400 W MPPT kit are not the same product. A PWM controller effectively clamps the panel to battery voltage — around 13–14 V — and throws away the panel’s extra voltage as heat. A 100 W panel with a Vmp of 18.5 V is producing 100 W at 5.4 A; a PWM controller can only use about 13.8 V × 5.4 A, or roughly 75 W. An MPPT controller converts that excess voltage into additional current and gets you back into the 90s. On a 400 W array, that gap is worth 60–80 W of usable panel, or roughly $80–$150 of extra panel you would otherwise have to buy.
Three specs separate a good MPPT controller from a mediocre one:
- User-definable charge voltages. If you cannot set absorption to 14.4 V and float to 13.5 V yourself, you are trusting a preset. Presets are usually fine for AGM and usually wrong for LiFePO4.
- Max PV input voltage. 100 V is the practical minimum for a 400 W-class system. 150 V gives you room for a three-panel series string.
- Battery temperature sensing. Lead-acid banks need absorption voltage adjusted for temperature — roughly −0.03 V/°C. Without a sensor, a flooded bank in a cold compartment gets chronically undercharged in winter, which is exactly when you can least afford it.
Battery Compatibility: The Numbers That Decide Whether a Kit Works
A kit that charges your battery to 80% is a kit that fails slowly. Every chemistry has a target voltage window, and a controller that cannot hit it will leave capacity on the table — most visibly with lithium, which needs a higher absorption voltage than most legacy RV converters and PWM controllers were built to deliver.
| Chemistry | Absorption / bulk | Float | Equalize | Usable capacity | Typical cycle life |
|---|---|---|---|---|---|
| Flooded lead-acid | 14.4–14.8 V | 13.2–13.4 V | 15.5–16.0 V, monthly | 50% | 300–500 cycles |
| AGM | 14.4–14.7 V | 13.2–13.4 V | Not recommended | 50–60% | 400–700 cycles |
| GEL | 14.1–14.4 V | 13.5–13.8 V | Never | 50% | 500–800 cycles |
| LiFePO4 | 14.2–14.6 V | 13.4–13.6 V or none | Never | 80–90% | 2,000–5,000 cycles |
Practical consequences:
- If you have a flooded bank, buy a controller that supports equalization and has temperature compensation. Skipping equalization on a flooded bank leads to sulfation, and sulfation is what actually kills RV lead-acid batteries — usually within two or three seasons.
- If you have AGM, make sure the controller’s AGM profile actually floats at 13.2–13.4 V. Some budget controllers float at 13.8 V, which slowly cooks a sealed battery.
- If you have LiFePO4, confirm the controller’s lithium profile and that its absorption voltage is at least 14.2 V. Also confirm the controller does not run an equalization cycle — an equalize charge of 15.5 V or higher will trip a lithium BMS into protection, and you will spend an evening wondering why your solar stopped working.
- If you are upgrading to lithium, the battery is often the larger purchase. A 100 Ah LiFePO4 runs roughly $250–$600 depending on brand and BMS features; a 100 Ah AGM runs roughly $180–$280. The lithium costs more upfront and delivers roughly double the usable amp-hours and five to ten times the cycle life, which is why most 2026 builds go lithium once and stop thinking about it.
One more compatibility point that kits do not advertise: the controller’s output current has to be safe for your bank. A 60 A MPPT controller pushing into a single 100 Ah AGM is a 0.6C charge rate, which is aggressive for lead-acid. Lithium handles it; AGM mostly does not. Match controller output to roughly 0.2–0.3C for lead-acid and up to 0.5C for LiFePO4.
Roof-Mounted vs Portable: A Decision Matrix
This is not a preference question. It is a function of your roof, your camping style, and whether you want to move the panels or the RV.
| Your situation | Best setup | Why |
|---|---|---|
| Full-time travel, mostly unshaded sites | 400–800 W roof-mounted rigid, MPPT | Set-and-forget charging, no setup ritual, works while driving |
| Heavily shaded forest campgrounds | 200 W roof + 200 W portable | Roof array is crippled by shade; portable panel moves to the sun |
| Class B van with a curved roof | 200–400 W flexible, bonded | Rigid panels cannot conform; low weight preserves payload |
| Renter, or RV under warranty you will not drill | Portable folding 200–400 W | Zero roof penetration, no permanent modification |
| Small trailer, 100–150 W roof area available | 200 W rigid in two 100 W panels | Two smaller panels route around vents and AC better than one large panel |
| Winter camping in northern latitudes | 600 W roof + DC-to-DC charger from the tow vehicle | Solar alone cannot close the winter gap; alternator charging covers it |
| Weekend trips, hookups most of the time | 100–200 W roof | Trickle-charges the bank and keeps the fridge cold between trips |
| Boondocking with a generator as backup | 400 W roof, MPPT with lithium profile | Solar does the daily work; generator covers cloudy stretches |
Portable panels carry a hidden cost: they have to be set out, angled, secured against wind, and put away every day, and they are the single most stolen item in a campground. If you go portable, budget for a cable lock and a longer cable run — 20–30 ft of 10 AWG so you can chase the sun without moving the RV. Long runs on undersized cable are the most common cause of “my portable panel doesn’t produce its rated watts.”
Installation Complexity and the Measurements Nobody Lists
Kit listings show wattage. They do not show you whether the box will fit through your RV door, whether four panels will actually fit around your AC unit, or whether you can reach the roof penetration point without removing a vent. Here are the numbers that matter.
Panel Footprints and Weights
| Panel | Dimensions | Area | Watts per sq ft | Weight |
|---|---|---|---|---|
| 100 W rigid | 41.8 × 20.9 × 1.4 in | 6.1 sq ft | 16.4 | 15–17 lb |
| 200 W rigid | 58.3 × 26.8 × 1.4 in | 10.8 sq ft | 18.5 | 26–28 lb |
| 100 W flexible | 42 × 21 × 0.1 in | 6.1 sq ft | 16.4 | 4–5 lb |
| 200 W portable (folded) | 23 × 21 × 3 in stowed | — | — | 16–20 lb with case |
| 400 W kit, boxed | 44 × 24 × 8 in typical | — | — | 65–85 lb |
Two of those rows are the ones that surprise people. A 200 W rigid panel is 58 in long — that is nearly five feet, and it will not fit diagonally across the roof of a short teardrop or a pop-up. And a 400 W kit ships in a single box weighing 65–85 lb, which is a two-person lift up a ladder, not a one-person job. If you are ordering a kit and planning to install it the same weekend, arrange for a second person and check the box dimensions against your RV door width before it arrives. A typical RV entry door is 22–26 in wide; a 44 in box goes through the door, not through the doorway of a tight wet bath.
Roof Real Estate Math
A 24 ft travel trailer has a roof roughly 8 ft wide and 24 ft long — about 190 sq ft of nominal area. Usable flat area after subtracting the AC unit (roughly 30 × 30 in, plus 6 in of clearance all around), two roof vents, a skylight, the antenna, and the required 2 in setback from every edge is typically 90–120 sq ft. At roughly 16–18 W per sq ft for rigid panels, that is a practical ceiling of about 1,400–2,000 W — but you will never reach it, because panels are rectangles and roofs are obstacle courses.
Realistic planning rules:
- Leave 3–4 in of gap between panels for airflow and thermal expansion. Panels that touch run hotter and lose 2–4% output.
- Keep 6 in of clearance from the AC shroud. Airflow matters, and you want room to service the AC without removing panels.
- Stay 2 in inside the roof edge. Panels hanging over the edge catch wind and look like a liability to any inspector.
- Prefer four 100 W panels over two 200 W panels when your roof is chopped up. Same watts, more placement options, roughly 4 lb more total weight.
- Weight budget: a 600 W rigid array plus mounting hardware adds roughly 105–120 lb to the roof. RV roofs generally handle several hundred pounds of static load, but check your specific model’s roof rating if you are also carrying a roof rack, kayak, or cargo pod.
Cable Gauge: The Silent Harvest Killer
Roof-to-controller runs are longer than people estimate — typically 15–25 ft one way on a trailer, 20–35 ft on a Class C. Undersized cable turns watts into heat. Target no more than 3% voltage drop at the array’s Vmp, which for a 12 V nominal array means roughly 18 V.
| Cable gauge | 10 A array | 20 A array | 30 A array |
|---|---|---|---|
| 14 AWG | up to 8 ft | not recommended | not recommended |
| 12 AWG | up to 13 ft | up to 7 ft | not recommended |
| 10 AWG | up to 20 ft | up to 10 ft | up to 6 ft |
| 8 AWG | up to 32 ft | up to 16 ft | up to 10 ft |
| 6 AWG | up to 50 ft | up to 25 ft | up to 16 ft |
| 4 AWG | up to 80 ft | up to 40 ft | up to 25 ft |
The escape hatch is series wiring. Put two 100 W panels in series and you double the voltage and halve the current, which cuts voltage drop by roughly 75% for the same cable. That is why most 400 W and larger builds run series-parallel strings into an MPPT controller with a 100 V or 150 V input rating rather than paralleling everything at 18 V.
What Wears First
Ranked by how often they cause a problem, RV solar failures look like this:
- MC4 connectors and cable entry points. Water intrusion at the roof gland is the number one leak source. Use a proper cable entry plate with a butyl gasket, not a hole filled with sealant.
- Mounting feet and sealant. Dicor-style self-leveling sealant over a butyl tape base, rechecked annually. Sealant alone fails within two to three seasons.
- Controller. Budget controllers fail at the terminals and in the heat sink. Mount the controller in ventilated interior space, not in a sealed battery box or an exterior compartment that sees 140°F.
- Battery bank. Lead-acid banks die of sulfation from chronic undercharging, usually in year two or three, before the panels show any degradation at all.
- Panels. The last thing to fail. A quality rigid panel loses roughly 0.5% of output per year; junction box potting is what fails, not the cells.
One more practical reality: you should not tow or drive with a portable panel deployed, and you should disconnect or switch off a roof array before doing any welding, battery work, or inverter service. Most kits include no disconnect. Add a 30–60 A DC breaker between the controller and the battery, and a PV disconnect between the array and the controller, so you can isolate either side without tools.
The Kits: A Spec-Based Roundup
What follows is organized by kit class and the situation each one suits. Where a brand is named, it is because the product line is well established and the spec pattern is consistent; where a specific configuration is not guaranteed across every retailer or model year, the kit is described by type and spec. Prices are general US market ranges as of 2026 and vary with promotions and bundle contents.
1. Renogy 400 W Rigid Kit with 40 A MPPT — The Default All-Rounder
This is the configuration most people should start with, and it is the closest thing the category has to a standard. The pattern is four 100 W rigid monocrystalline panels, a 40 A MPPT charge controller, Z-bracket mounting feet, 10 AWG tray cable, and MC4 connectors. Panel dimensions land around 41.8 × 20.9 in each, so the four-panel array needs roughly 26–28 sq ft of usable roof plus gaps. Total kit weight ships around 70–80 lb.
Why this wattage: 400 W with a 40 A MPPT controller produces 1,200–1,650 Wh a day in good summer sun, which is 94–129 Ah at 12 V. That covers a compressor fridge, a vent fan, LED lighting, a laptop, and phone charging with margin, and it leaves enough headroom to recharge a 200 Ah lithium bank from 50% in about a day and a half of decent sun.
The controller is the reason to pick this class over cheaper 400 W kits. A 40 A MPPT with a selectable lithium profile, AGM profile, flooded profile, and user-definable voltages will charge anything from a 100 Ah AGM to a 400 Ah LiFePO4 bank without a chemistry mismatch. If you are on a flooded bank, confirm the controller supports equalization; if you are on lithium, confirm you can disable it.
Watch for: the 40 A controller is the correct match for 400 W, but it has essentially no headroom. If you plan to expand to 600 W later, buy the 50 A or 60 A version now — replacing a controller costs more than upgrading it upfront. Typical price range for the 400 W class with MPPT: $500–$900.
Best for: 20–28 ft travel trailers, Class C motorhomes, and full-time rigs with moderate loads in decent sun.
2. Renogy 200 W Starter Kit — Small Trailers and Vans
Two 100 W rigid panels and a 20 A MPPT controller. That is 600–825 Wh a day in good sun, or 47–64 Ah, which covers lighting, a vent fan, a water pump, and phone and laptop charging, and it tops up a compressor fridge rather than fully running it.
The 200 W class is the sweet spot for a teardrop, a pop-up, a small Class B, or a weekend trailer with a 100 Ah AGM bank. Roof footprint is about 13–14 sq ft with the gap between panels, which fits almost any RV roof. Kit weight is around 40–45 lb.
The trade-off is expansion. A 20 A MPPT controller tops out around 260 W of array. If you think you will want 400 W within two years, buy the 400 W kit and install two panels now, or buy the 200 W kit with a 30 A controller so you have room.
Watch for: some 200 W kits ship with a 20 A PWM controller instead of MPPT. That drops daily harvest to roughly 420–570 Wh and makes the kit a poor value at the same price. Check the controller spec before buying.
Typical price range: $250–$450 with MPPT.
3. Renogy Flexible Panel Kits — Curved Roofs, No Drilling
Flexible 100 W and 175 W panels are the answer when your roof curves and rigid panels would either not sit flat or would require an angled mounting frame that looks and performs badly. These panels are 4–5 lb each at 100 W and roughly 0.1 in thick, so they bond directly to the roof surface with adhesive or a low-profile mounting frame.
The physics trade-off is unavoidable. A flexible panel bonded to a roof has no airflow underneath, runs 20–30°C hotter than a rigid panel, and heat accelerates encapsulant degradation. Expect a 5–8 year service life rather than 20+. Efficiency is also lower, 15–18% versus 19–23%, so you need more roof area for the same watts.
A 200 W flexible array weighs about 9–10 lb — less than a quarter of the rigid equivalent — which matters on a van conversion where payload is tight and every pound counts against your GVWR.
Watch for: do not fully bond the panel to the roof if you can avoid it. A 0.5 in air gap using a perimeter frame dramatically extends life. Also verify the panel’s junction box is on the uphill side of any roof curvature so water does not pool against it.
Typical price range: $200–$400 for a 200 W flexible kit with a 20 A MPPT controller.
4. Go Power! Expandable RV Kits — OEM-Grade, Pre-Wired Friendly
Go Power! has been the OEM supplier for a lot of RV manufacturers, which means many trailers and motorhomes arrive with a “solar-ready” port, an SAE or MC4 rooftop connector, and 10 AWG pre-run cable terminating near the battery compartment. Their kit lines — in the 100 W, 160 W, 190 W, 200 W, and 480 W expandable range — are designed to plug into that pre-existing infrastructure with minimal work.
The practical advantage is real: if your RV already has a solar prep port, a matching kit eliminates the hardest part of the install, which is routing cable from the roof to the battery without cutting interior panels. The expandable 480 W class uses multiple 160 W panels and a controller sized for the full array, so you can start with two panels and add more later.
Watch for: verify the gauge of your factory pre-run cable before sizing an array. Some manufacturers pre-wire with 10 AWG, which is fine for 400–600 W at 12 V over a 20 ft run; a few use 12 AWG, which limits you to roughly 200 W before voltage drop becomes significant. Check the printed marking on the cable jacket, or measure the conductor.
Typical price range: $300–$700 for 200 W, $900–$1,600 for the 480 W expandable class.
5. Zamp Solar Kits — Premium, US-Assembled, Integrated Controller
Zamp builds panels in the US and integrates the charge controller into the panel housing on several of its portable and roof lines, which shortens the wiring run and simplifies the install. Their kits typically use SAE connectors and a proprietary roof port, and their portable suitcase panels fold into a carry case with an integrated controller.
The premium is real — expect to pay 30–60% more per watt than a comparable imported kit — and the justification is mostly build quality, US-based support, and a connector system designed for RV use rather than adapted from residential solar. If you are paying someone to install and you want a single brand accountable for the whole system, that premium is easier to defend.
Watch for: integrated controllers are convenient but harder to replace and often less configurable than a standalone MPPT. Confirm the integrated controller has a lithium profile at 14.2–14.6 V absorption if you run LiFePO4, and confirm its maximum array input if you plan to expand.
Typical price range: $350–$800 for 200 W-class; portable suitcase panels $400–$900.
6. Rich Solar 200 W and 400 W MPPT Kits — Mid-Price, Good Controllers
Rich Solar occupies the value-to-quality middle ground. Their kits typically pair rigid monocrystalline panels with a genuine MPPT controller — often 20 A or 40 A — plus mounting brackets, cable, and MC4 connectors. The panels are conventional 100 W or 200 W formats, so the roof footprint math is identical to the other rigid kits described here.
The reason to consider this class is that the controller is not the weak link. A 400 W Rich Solar-class kit with a 40 A MPPT will produce within a few percent of any premium kit at the same wattage, because the panels are commodity monocrystalline and the controller is doing the same job. What you give up is brand support depth and sometimes the finish quality of the mounting hardware.
Watch for: kit contents vary between retailers even under the same nominal product name. Confirm the bundle includes mounting brackets, a cable entry gland, and enough cable for your roof-to-battery run. Those items add $60–$120 if bought separately.
Typical price range: $280–$480 for 200 W; $550–$950 for 400 W.
7. HQST 100 W and 200 W Kits — Budget Entry Point
HQST is a budget line, and it is honest about what it is: lower-cost rigid panels, a basic controller, and a price that undercuts the mid-tier by 25–35%. A 100 W kit with a 20 A PWM controller runs roughly $130–$200. A 200 W kit runs roughly $250–$380.
At 100 W, PWM is defensible. The array is small enough that the harvest loss — roughly 25 W — is proportionate to the money saved, and a 100 W trickle array is often just keeping a battery topped between trips. At 200 W and above, the PWM penalty grows to 40–50 W and the math turns against the kit. If you buy a 200 W HQST-class kit, plan to replace the controller with a 20 A MPPT within the first year, which costs $90–$160 and turns the kit into a genuinely good system.
Watch for: check the panel’s temperature coefficient and warranty. Budget panels sometimes use a shorter warranty period, which is a signal about the encapsulant and junction box quality.
Best for: first-time installers, small trailers, and anyone keeping a battery topped on a rig that mostly sits.
8. WindyNation Kits — Cheap, Expandable, Controller Is the Weak Point
WindyNation sells 100 W through 400 W kits with a P30L-class PWM controller and complete wiring. Prices are among the lowest per watt in the category, which makes these kits popular for a first build or a second system on a hunting cabin or boat.
The panels themselves are ordinary rigid monocrystalline and perform to spec. The controller is the constraint: PWM, limited profiles, and a ceiling around 30 A. On a 200 W kit, that is roughly 150 W of usable harvest. On a 400 W kit, the mismatch is large enough that you should simply budget for a 40 A MPPT replacement at the same time you buy the kit.
Watch for: the included cable is often 12 AWG. On a roof run longer than about 12 ft at 20 A, that is a meaningful voltage drop. Upgrading to 10 AWG costs $25–$45 and is worth it.
Typical price range: $150–$250 for 100 W; $350–$550 for 400 W with PWM.