Key takeaways
- Photograph each drawer after organizing it; the image becomes a quick reset guide after a busy project.
- Keep one open compartment for tools that need cleaning or repair so they do not disappear back into the chest.
- Use removable labels when your projects change seasonally, especially for gardening, camping, and winter-maintenance gear.
- Wipe muddy or damp tools before storage and leave wet equipment open to dry; organizers cannot prevent corrosion by themselves.
What's inside
A well-organized tool chest is more than a tidy place to store equipment. It is a faster, safer base camp for everything from trailhead repairs and garden maintenance to deck projects and seasonal home upkeep. When every wrench, driver, bit, and fastener has a predictable home, you spend less time digging through a crowded drawer and less time leaving tools exposed to weather or moisture.
This guide explains how to organize a tool chest around the way you actually work outdoors. You will learn how to sort tools by task, choose drawer organizers and socket storage, decide when a rolling modular box makes sense, and build a layout that remains useful as your collection grows. The goal is not showroom perfection; it is quick access, sensible weight distribution, and durable storage.
As an Amazon Associate we earn from qualifying purchases.



1. Start With an Honest Tool Inventory
Empty the chest completely before buying organizers. Group tools into broad working categories: hand tools, measuring tools, cutting tools, fasteners, electrical items, automotive or bicycle tools, and outdoor-maintenance equipment. Then separate frequently used tools from occasional and specialist items.
Outdoor work often involves muddy gloves, changing light, and a need to move quickly. Put everyday essentials—such as pliers, adjustable wrenches, screwdrivers, tape measures, utility knives, and a small selection of hex keys—in the easiest-to-reach drawers. Keep delicate measuring instruments and battery-powered tools away from loose metal parts that could scratch or damage them.
2. Assign Drawers by Function and Weight
Use the upper drawers for small, frequently used hand tools and accessories. A middle drawer is suitable for heavier wrenches, pliers, and ratchets, while the lowest drawer should carry the densest items. This keeps the chest stable and reduces the chance of it tipping when several drawers are open.
Organize horizontally wherever possible. A drawer should let you identify an item at a glance rather than requiring a second layer of tools to be lifted out. Tray dividers are useful for creating bays sized to the tools you own. The A-LuGei 69-piece, five-size organizer set is a practical option when a chest contains a mix of small parts and hand tools. Its larger-size format can also suit wider drawers and rolling workstations.
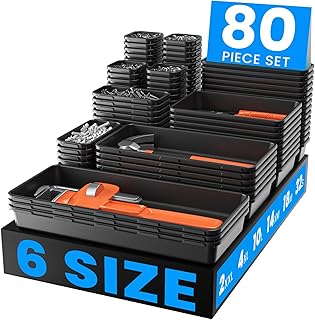
For a more extensive collection, the A-LUGEI 80-piece organizer with six sizes is designed around a larger assortment and can help divide a broad tool-chest drawer into many smaller sections. Choose based on drawer dimensions first; a highly configurable set is not helpful if it leaves awkward gaps or prevents the drawer from closing.
3. Match Organizer Size to the Tools
Measure the inside width, depth, and usable height of each drawer—not just the exterior of the chest. Account for drawer slides, lips, locks, and any raised interior surfaces. Leave a little clearance so trays can be lifted out and rearranged without scraping the sides.
Use snug compartments for drivers and pliers, but avoid forcing tools into slots that are too tight. Small parts need shallow bins so washers, screws, anchors, and cotter pins remain visible. The A-LuGei 46-piece, five-size tray set is suited to a compact assortment, including small hardware that might otherwise migrate around a drawer. Its listed use for bathroom drawers also reflects the versatility of this style of compartment storage.
Extra-thick plastic can be worthwhile in a chest that is opened frequently or transported to outdoor projects. The A-LuGei six-size tray set, marketed for fitting more than 100 tools, is worth considering when you need a robust, highly segmented layout. Treat capacity claims as a starting point: unusually bulky tools will reduce the actual number of pieces you can place comfortably.
4. Give Sockets and Small Hardware Their Own System
Sockets are easy to scatter because they look similar and often come in both SAE and metric sizes. Keep them arranged by drive size, then by measurement. For example, create separate runs for 1/4-inch, 3/8-inch, and 1/2-inch drive, with shallow and deep sockets clearly distinguished.
A magnetic holder can make this arrangement especially convenient in a steel tool chest or cart. The EACELIY magnetic socket organizer set includes holders for 1/2-inch, 1/4-inch, and 3/8-inch SAE and metric sockets and is listed to hold up to 141 standard sockets. Because sockets are not included, it is a storage solution rather than a complete socket kit. Check that the magnetic backing sits securely and does not slide when a drawer is opened sharply.
Use labeled containers for mixed fasteners. Labels such as “wood screws,” “machine screws,” “hose clamps,” or “trail repair” are more useful than vague labels like “miscellaneous.” For outdoor work, reserve one small bin for consumables you regularly replace, such as zip ties, electrical tape, and spare blades.
5. Choose Portable Storage for Mobile Work
A stationary chest is ideal for a workshop, but outdoor-living projects often move between a garage, shed, vehicle, and work area. A modular rolling system can reduce repeated trips without forcing you to carry one overloaded case. Look for large wheels, a comfortable telescoping handle, secure latches, and enough weather resistance for sheltered transport.
The Keter Stack N Rolling Tool Box Modular Storage System is a three-piece option with all-terrain wheels, a telescoping handle, and weatherproof construction. Its modular format can separate bulky tools from smaller accessories, though it should still be stored under cover rather than treated as permanently waterproof. Before committing, check whether the packed system fits your vehicle and whether the stacked units are comfortable to lift when separated.
Tips
- Photograph each drawer after organizing it; the image becomes a quick reset guide after a busy project.
- Keep one open compartment for tools that need cleaning or repair so they do not disappear back into the chest.
- Use removable labels when your projects change seasonally, especially for gardening, camping, and winter-maintenance gear.
- Wipe muddy or damp tools before storage and leave wet equipment open to dry; organizers cannot prevent corrosion by themselves.
Frequently Asked Questions
Should tools be organized by type or by task?
Use a combination. Group similar tools together for efficient storage, but place the tools used together most often in neighboring compartments or drawers. A dedicated repair kit can be helpful for recurring outdoor jobs.
Are plastic drawer dividers strong enough for a tool chest?
They are generally suitable for hand tools and small hardware when properly supported by the drawer base. Avoid overloading them with heavy sockets or large metal tools unless the organizer is specifically designed for that weight.
How much empty space should a drawer have?
Leave enough room to remove tools without catching neighboring compartments. A drawer packed edge to edge may look efficient, but a small amount of clearance makes tools easier to identify and helps accommodate future additions.
What is the best way to prevent rust?
Store tools dry, wipe away dirt and moisture, and avoid sealing damp equipment inside a closed box. In humid areas, consider a suitable rust-inhibiting product and inspect metal tools regularly, particularly after wet outdoor work.
Conclusion
The best tool-chest layout follows your real working habits: frequently used tools stay within easy reach, heavy items sit low, sockets remain sorted by drive and size, and small parts have defined compartments. Measure before buying organizers, select storage that suits both your tools and your mobility needs, and review the arrangement after a few projects. A practical system should make the next repair feel simpler—not add another chore to the list.