
Key takeaways
- Measure the loaded-bar envelope, not the rack. Add 20 inches to the frame width for sleeve overhang and collars. If that number exceeds your clear wall span, a cage will fight you every session.
- Check hole spacing where it matters. Two-inch spacing through the bench-press zone is what lets you dial J-hooks and safeties to the right height. Wider spacing on a budget frame often means your safeties sit either too high to press under or too low to catch a failed rep.
- Confirm the upright tube size before buying attachments. CAP frames vary across the line, and a dip bar or landmine sleeve built for one tube profile and hole diameter will not seat on another. Match the spec, not the brand name.
- Decide whether you will anchor it. Bolting into a slab dramatically stiffens a light rack. If you rent or lift on a wood subfloor, plan on a wide-base cage, a plywood platform, or added weight-horn ballast instead.
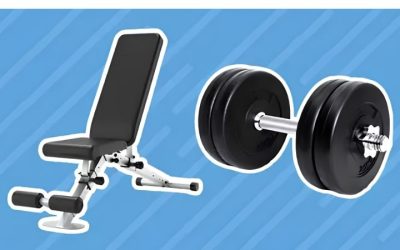
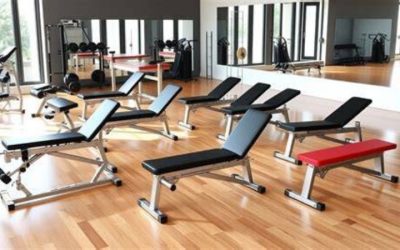
- Budget for the bench separately. Rack packages that bundle a bench usually bundle a thin one. The bench is the part your ribcage sits on; treat it as its own purchase decision.
What's inside
The decision between a full cage and a half rack almost never comes down to lifting philosophy. It comes down to a tape measure. Pull one out and check three numbers before you shop: the clear floor depth you can surrender permanently, the distance from the slab to the lowest ceiling obstruction (joist, garage door track, light fixture), and the width of unobstructed wall you have for a loaded barbell. That last one surprises people. A 7-foot Olympic bar is 86 inches long, and once you add collars and the sleeve overhang past a 48-inch-wide frame, you need close to seven and a half feet of side-to-side breathing room just to rack and unrack without scraping drywall.
Once those three numbers exist on paper, the cage-versus-half-rack argument resolves itself quickly. A four-post cage gives you enclosed safety and a pull-up bar, but it eats roughly 4 by 4 feet of permanent footprint and wants 7’6″ or more of ceiling to make that pull-up bar usable. A half rack pushes against the wall, opens up the front for stepping in and out, and forgives a low garage ceiling — at the cost of relying on spotter arms rather than four walls of steel. Below is a look at where CAP Barbell’s power rack line and its attachment ecosystem land in that tradeoff, plus a framework for picking the format that fits the space you actually have rather than the gym you imagine.
As an Amazon Associate we earn from qualifying purchases at no extra cost to you. Product prices and availability are accurate as of the date shown and are subject to change.

#1 Pick

#2 Pick

#3 Pick

#4 Pick

#5 Pick

#7 Pick

Quick Comparison
| Format | Typical Footprint | Ceiling Needed | Strongest Use Case | Main Compromise |
|---|---|---|---|---|
| CAP Barbell Power Rack (full cage) | Roughly 48" wide × 46–50" deep | About 7’4″–8′ | Solo lifting with heavy squats and bench inside the frame | Permanent footprint; awkward in a shared garage bay |
| CAP Barbell Half Rack / Squat Stand | Roughly 48" wide × 24–30" deep | Works under 7′ | Tight bays, low ceilings, lifters who need front access | Spotter arms are your only backstop |
| CAP Attachments (dip bars, landmine, J-hooks) | Bolts to existing uprights | N/A | Adding accessory work without adding equipment | Hole spacing and tube size must match your frame |
| Adjustable squat stands (no crossmember) | Two separate bases, movable | Any | Rooms that must return to normal use | No pull-up bar, lower ceiling on load |
How to Choose
- Measure the loaded-bar envelope, not the rack. Add 20 inches to the frame width for sleeve overhang and collars. If that number exceeds your clear wall span, a cage will fight you every session.
- Check hole spacing where it matters. Two-inch spacing through the bench-press zone is what lets you dial J-hooks and safeties to the right height. Wider spacing on a budget frame often means your safeties sit either too high to press under or too low to catch a failed rep.
- Confirm the upright tube size before buying attachments. CAP frames vary across the line, and a dip bar or landmine sleeve built for one tube profile and hole diameter will not seat on another. Match the spec, not the brand name.
- Decide whether you will anchor it. Bolting into a slab dramatically stiffens a light rack. If you rent or lift on a wood subfloor, plan on a wide-base cage, a plywood platform, or added weight-horn ballast instead.
- Budget for the bench separately. Rack packages that bundle a bench usually bundle a thin one. The bench is the part your ribcage sits on; treat it as its own purchase decision.
Top Picks Reviewed
CAP Barbell Power Racks and Attachments
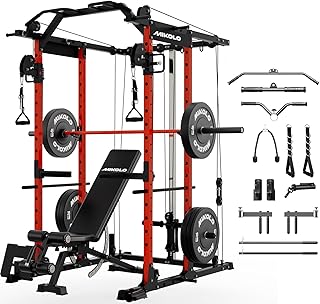
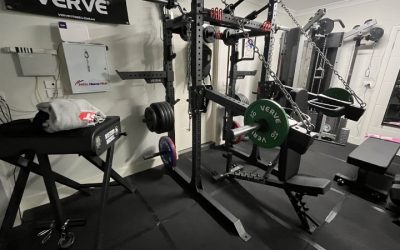
CAP’s rack line exists in a specific and useful niche: entry-cost steel that gets a beginner or intermediate lifter squatting and pressing safely at home without the freight bill of a commercial cage. The full cage versions give you the thing that matters most for solo training — four uprights, adjustable J-hooks, and safety bars that turn a missed squat from an emergency into an inconvenience. Assembly is bolt-together rather than welded, so plan for an evening with a socket wrench, a second set of hands for the top crossmembers, and a follow-up retorque after your first week of loading. That retorque is not optional; bolted frames settle, and a quarter turn on each fastener removes most of the rattle people complain about.
The attachment catalog is where this line earns its keep in a small room. Dip handles, landmine sleeves, weight-plate horns, and replacement J-hooks let a single frame absorb the jobs you would otherwise buy separate equipment for. In a 10-by-12 spare bedroom, that consolidation is the whole point — a rack that also handles dips, rows, and rotational work is one machine instead of four. Just verify the mounting spec against your exact frame before ordering, because the line spans several upright profiles and mismatched hardware is the single most common frustration with budget rack ecosystems.
Know the ceiling on this equipment, both literally and figuratively. These frames are not designed for someone chasing a 500-pound squat with aggressive re-racking; the gauge of steel and the bolted joints put practical limits on how much abuse the frame absorbs cheerfully. If your working sets live in the moderate range and you value floor space and price over commercial-grade rigidity, that limit is irrelevant to you. If you are already strong and planning to get much stronger, treat a CAP rack as a capable starting point rather than a lifetime purchase, and put the money you save into a good bar and a bench you trust.
Frequently Asked Questions
Does a home power rack have to be bolted to the floor?
Not necessarily, but stability improves noticeably when it is. If you cannot drill, widen the effective base with weight horns loaded with plates, set the rack on a 3/4-inch plywood platform to distribute load, and avoid slamming the bar into the J-hooks. Kipping pull-ups on an unanchored light frame are where trouble usually starts.
Can I safely bench inside a cage without a spotter?
Yes, provided you set the safety bars at the height where a failed rep lands on steel and not on your chest. Test it with an empty bar first: lie down, lower to touch, and confirm the safeties catch the bar while leaving clearance above your torso. If the hole spacing forces you to choose between too high and too low, that rack is not suited to solo pressing.
My garage ceiling is only 7 feet. Cage or half rack?
Half rack, or a cage with the pull-up bar left off. At 7 feet you have no realistic overhead pulling clearance, so a cage’s biggest structural advantage stops paying rent. Use a doorway bar or rings on a joist for pulling and keep the floor space.
Which attachments are actually worth adding first?
Spotter arms if your frame did not include them, then a landmine sleeve. Spotter arms buy you safety on every squat and press. The landmine unlocks rows, presses, and rotational work in almost no additional space. Dip handles are excellent but a lower priority unless dips are already in your program.
Final Thoughts
The best rack for a home gym is the one that still fits after you add a barbell, a bench, and room to walk around both. That means the format decision — cage or half rack — deserves more thought than the brand decision. If you have the depth and headroom, a CAP full cage delivers enclosed solo-training safety at a price that leaves budget for the bar and plates that actually determine how your training feels. If your ceiling is low or the bay does double duty as parking, the half rack format is not a downgrade; it is the correct answer, paired with spotter arms you set carefully every session. Measure first, verify attachment compatibility against your specific frame, and retorque the bolts after week one. Get those three things right and this equipment will quietly do its job for years.
Write Your Review
No reviews yet. Be the first to share your experience!